- Author:
- Seema Anand
- Subject:
- Science
- Material Type:
- Activity/Lab, Formative Assessment
- Level:
- Middle School
- Grade:
- 6
- Tags:
- License:
- Creative Commons Attribution Non-Commercial
- Language:
- English
- Media Formats:
- Downloadable docs
Education Standards
GEDB Rock Cycle: Rock Cycle Simulation (Lesson 2 of 5)

Overview
The students will use a simulated rock and perform various tasks to see what actually happens to rocks and rock fragments as they undergo the transformations within the rock cycle. This lesson was developed by Richard Kidd as part of their completion of the North Carolina Global Educator Digital Badge program. This lesson plan has been vetted at the local and state level for standards alignment, Global Education focus, and content accuracy.
Lesson Plan
Description
The students will use a simulated rock and perform various tasks to see what actually happens to rocks and rock fragments as they undergo the transformations within the rock cycle.
Content
Learning Targets and Criteria for Success
Explain how heat flow, volcanoes, plate tectonics, earthquakes, and the rock cycle are related. (6.E.2.2)
Explain the process of the rock cycle as it relates to soil formation. (6.E.2.3)
Learning Tasks and Practice
Engaging Question: What processes are involved in creating rocks?
The students will use common, everyday materials to simulate the processes they learned about in the previous lesson to create their own “rocks.”
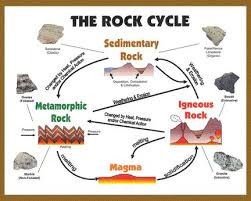
Step one: the students will gather their first materials: three different colors of crayons, scissors, and a square of aluminum foil. They will use the scissors to “weather” the parent rock (crayons) into sediment (crayon crumbs) onto the square of aluminum foil. The students will then fold the foil to create a pocket that the crayon crumbs can’t fall from then they will simulate time and pressure by pressing on the packet until the crumbs reform into a new rock, a “sedimentary” rock. They will draw their “sedimentary rock” on their lab report.
Step two: The students will take their “sedimentary rocks” still in their foil pouches or packets to the heated water bath, where they will float in the heated water for 10-15 seconds. This will simulate the heat needed to make the sedimentary rock get soft but not melt completely, which will make a “metamorphic rock.” The students will then take their “metamorphic rock” back to their work station and draw what their “new” rock looks like on their lab report.
Step three: The students will take their “metamorphic rocks” back to the heated water bath for another immersion, this time letting the “rock” completely melt, which will simulate the heat experienced from being subducted back into the mantle of the earth. After a complete melt the students will then allow their “magma” to cool and form a new “igneous rock” which they will also draw on their lab report.
After the students finish their rock making activities there are analysis questions on the lab report sheet which will have them explain how each process they did coincides with one of the processes that happens to rocks and sediment as it travels through the rock cycle.
Collecting and Documenting Evidence of Learning
Sample lab report sheet:
Rock Cycle Lab
1. When you broke down your crayons into crumbs, what process does that simulate in the rock cycle? _______________________________________
2. How did you simulate the pressure that is applied to make certain types of rock? ______________________________________________________________________
3. What type of rock did you make by applying pressure to the various crayon crumbs? ________________________________________
4. Draw your rock here
5. What process in the rock cycle is represented by the heat you applied to your rock? _____________________________________________
6. Why do you take the rock out of the heat so fast? __________________________________
7. What type of rock is formed when there is heat and pressure applied but not enough to completely melt the rock? ___________________________________
8. Draw your next rock here
9. By heating your new rock more, what happened? ________________ What can this represent in the rock cycle? _____________________
10. What type of rock is formed when rocks get completely melted then cool and re-solidify? ____________________
11. Draw your final rock here
12. On the back, explain why your last rock does not resemble the original crayons you began with.
he students will use a simulated rock and perform various tasks to see what actually happens to rocks and rock fragments as they undergo the transformations within the rock cycle. This lesson was developed by Richard Kidd as part of their completion of the North Carolina Global Educator Digital Badge program. This lesson plan has been vetted at the local and state level for standards alignment, Global Education focus, and content accuracy.